|
| |
Friday, October 12, 2012
Backyard Theater Electrical Box: My Favorite Upgrade (so far)
 DISCLAIMER:I totally stole this idea from BYT.com member scottw a couple months ago. He permanently installed a re-purposed electrical box under his backyard deck with all of his audio/video connections inside so he wouldn't have to drag his cables in and out of the house every night for every showing. As soon as I saw it I knew the HyltoPlex needed one too. DISCLAIMER:I totally stole this idea from BYT.com member scottw a couple months ago. He permanently installed a re-purposed electrical box under his backyard deck with all of his audio/video connections inside so he wouldn't have to drag his cables in and out of the house every night for every showing. As soon as I saw it I knew the HyltoPlex needed one too.

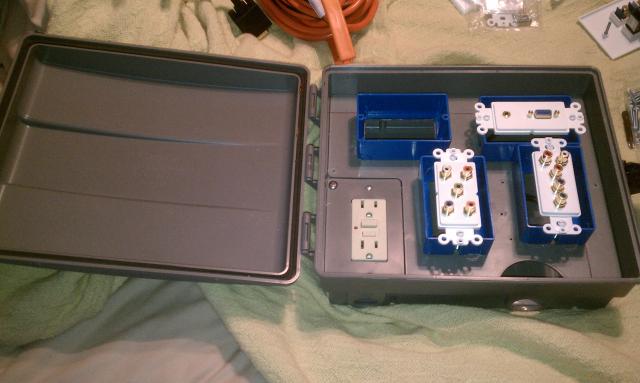
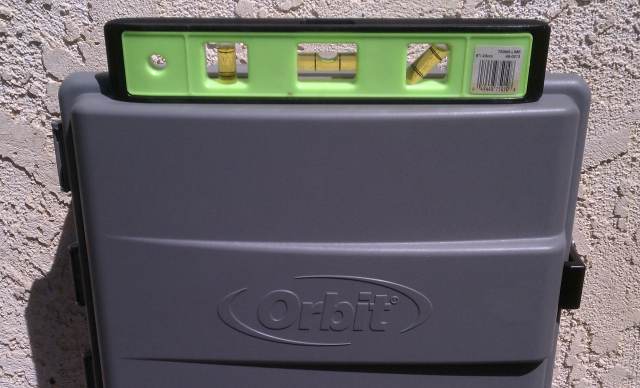
 I knew from the start I wanted a BIG box with room for future additions, so I started with this Weather Resistant Sprinkler Timer Cabinet. You're supposed to put an indoor sprinkler timer in to protect it from the elements (electrical outlet is included, timer is not). I knew from the start I wanted a BIG box with room for future additions, so I started with this Weather Resistant Sprinkler Timer Cabinet. You're supposed to put an indoor sprinkler timer in to protect it from the elements (electrical outlet is included, timer is not).
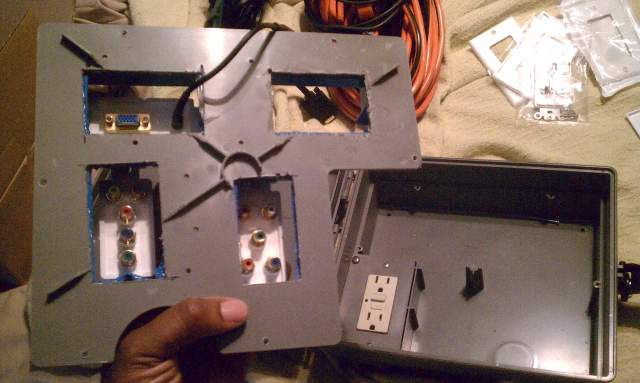
OR you can cut holes in the top plate, cut corresponding holes in a few plastic electrical boxes, and glue them together like this:
(I meant to take pre-gluing pics too but I forgot, sorry. BTW, epoxy is no joke)
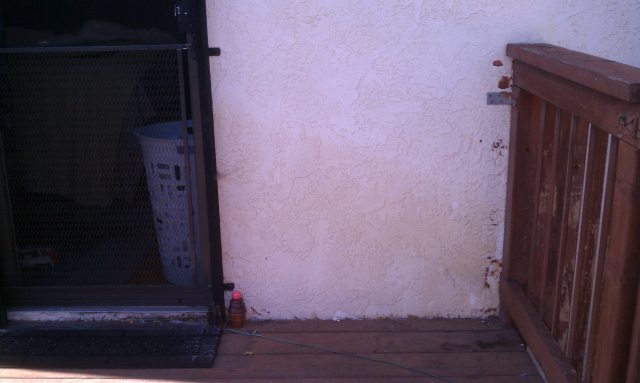
Here's my spot on the wall, right outside my bedroom on the left, a couple feet away from the screen (out-of-shot on the right):
Here are my wall holes w/ labels:
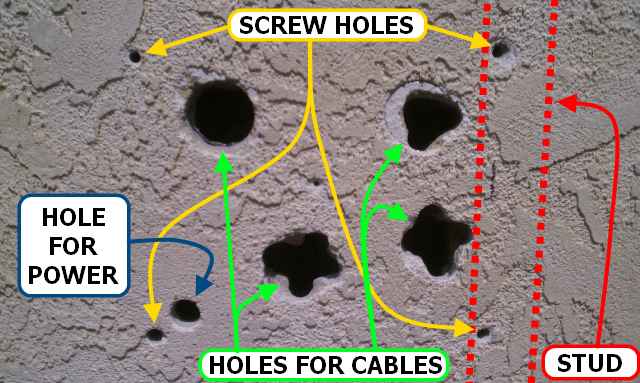
(Photo is crooked, stud is not)
God forbid my wife walked outside while I was drilling these giant (lop-sided) holes in the back of my house, so I had to wait for her to be out of the house long enough for me to measure the spot, mark the holes, cut the holes, apply sealant, mount/seal the box, and run the cables through. I know she'd be fine seeing the finished product, but not so much if she saw it "in progress". Even after I was all done and she saw the installed box, she still audibly GASPED when I showed her the pic above. Women, right??
All this time, I thought my house would be made of wood underneath the stucco/plaster. But Nope!
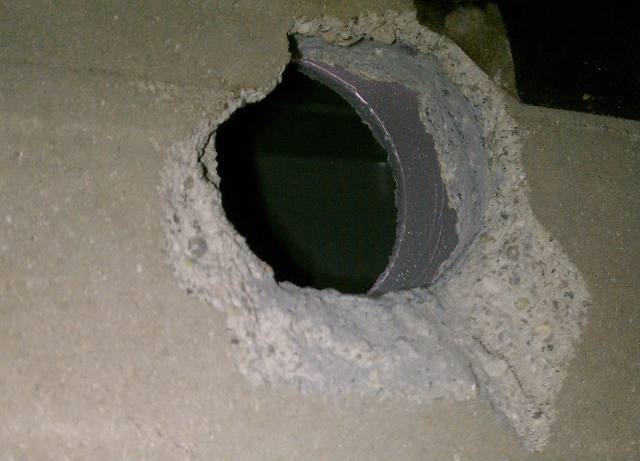
This is a shot of the INSIDE of my wall, and it turns out my house is made of concrete and chicken wire. Who knew? Not me!
That's why I wore the teeth out on my 1 3/4" drill bit on the first (and only round) hole and had to switch to a smaller masonry bit for the others. And THAT is why the other 3 holes are so ugly. Don't look at them!
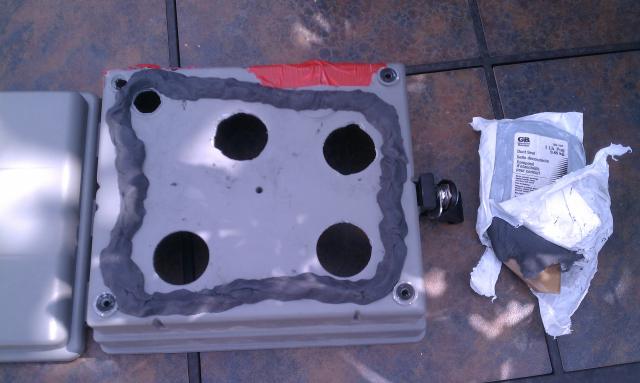
Anywho, next I sealed the box by putting this gummy Duct Seal stuff on the back. It's water-proof, never dries, and has the consistency of sticky, already-chewed gum:
AAAAAAAAND.....
I forgot to take a pic, but it also has a keyed lock on the side to keep haters out of my box.
MIRACULOUS!!!!!!!!
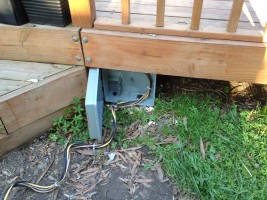
Then I ran my cables from the cable box & computer in my bedroom, under the house, back up in the wall (from the bottom) and out to the box:
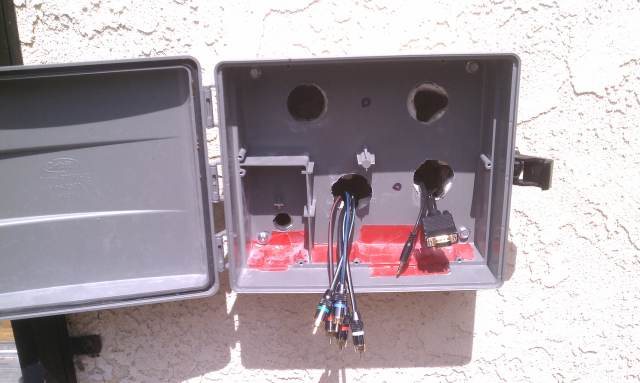
I used red duct tape to cover a couple holes the box came with. scottw used rubber plugs in his but I couldnt find any suitable plugs for mine.
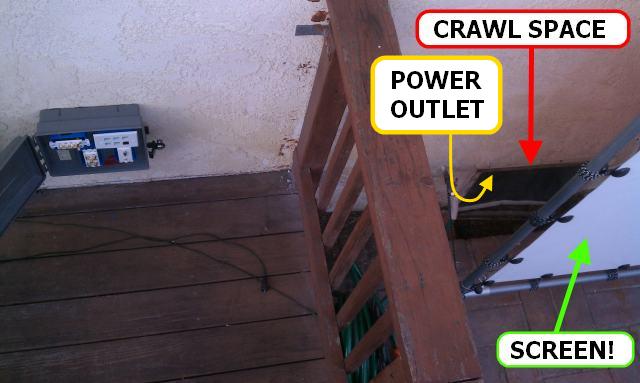
I ran power from an electrical outlet I found under my house, just inside the crawl space behind my screen:
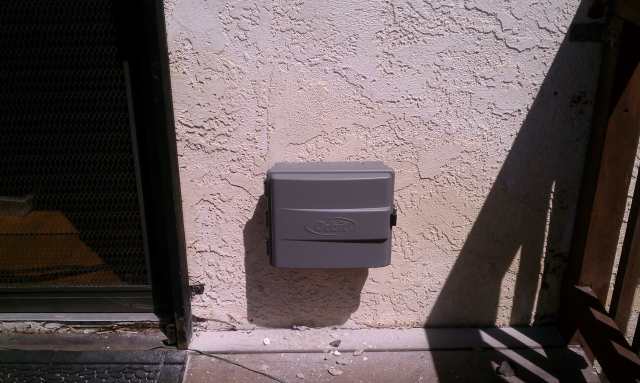
FINISHED PRODUCT:
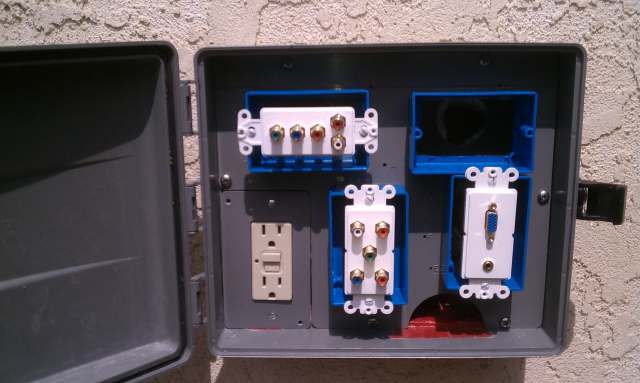
Bottom outlets are bedroom cable box on the left (no DVR) and bedroom computer on the right.
The top-left outlet is from the DVR in my man-cave.
I'm leaving that top-right spot open for future additions (USB? Ethernet? HDMI? Speakers?? Death ray lasers???)
|

|
|
|