|
| |

First things first, TIME FOR SHOUT-OUTS:

First shout-out goes to my first backyard setup above. My old screen was 8' wide X 6' tall, producing a 120" (10 foot) diagonal picture. Pretty impressive, but it's hard to stay complacent once you enter the world of backyard theater.
Second shout-out goes to my boy Jeff. He used to live a couple blocks away but we met on the now defunct backyardtheater.com. We worked pretty much side-by-side (LITERALLY) on our new screens & BYT's together, so when you see me refer to "we" and "us" below, that's who I'm talking about. Thanks homie!
NO MORE SHOUT-OUTS, LET'S GOOOOOOOOOO!!
Me and Jeff spent months last year plotting and planning our BYT upgrade plans. PVC (plastic tubing) or EMT (metal tubing) frame? Homemade "Black-Out Cloth" screen or something bought from Carl's Screens maybe? We went back and forth a few times about what to make our frames out of before FINALLY settling on metal tubing, but more on the frame later.
Let's talk about the screen first:
We decided to go with billboard tarp pretty quickly because:
A] Billboard tarp is way cheaper than BOC.
B] Billboard tarp comes in bigger sheets than BOC does
C] Billboard tarps are WAY more durable than most (all?) other screen material options.
They're made SPECIFICALLY to stand up to the elements (wind, rain, sun, snow, WHATEVER) while being left outside for long periods of time.
I knew early on that my new setup wasn't going to be the "set-up & take-down for every show" type so billboard tarp was a no-brainer. But where to find some??
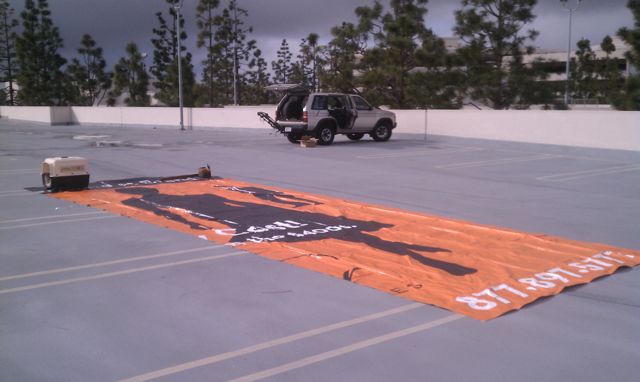
There are a few websites that sell recycled/used billboard tarps, but we focused on BillboardTarps.com. We always planned on buying one giant tarp and cutting it into our 2 separate screens, but the size we needed to do all that was always sold out. Then out of the blue it hit me: Didn't the neighbors at my old job used to have piles of this stuff in their warehouse for re-purposing into handbags & backpacks?? So I called them up and they gave me this 30' x 11' beauty for FREEEEEEEEEE:
It's half of an ad for a condo development or something but don't bother calling.
I'm sure all the good spots are taken by now.
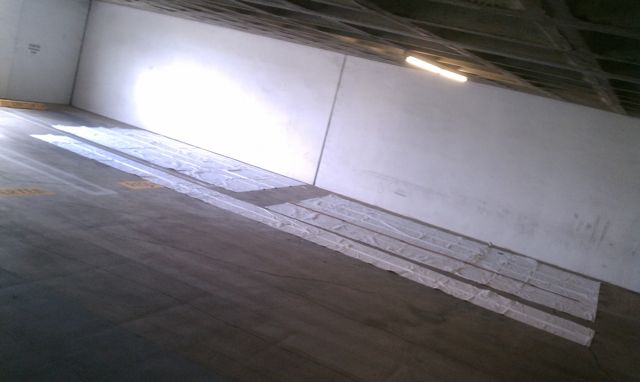
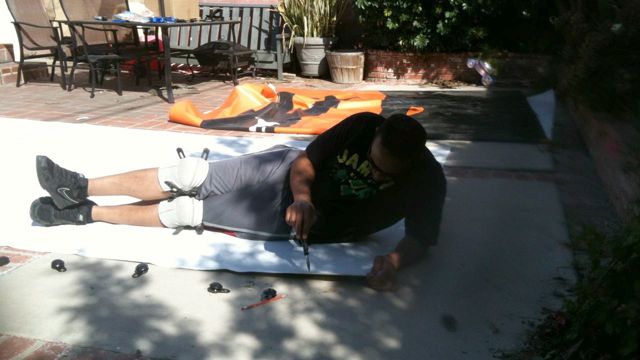
Neither of our backyards or driveways were big enough for it, so we took it to the top floor of my job's parking structure to lay it all out. We eventually had to take it down to one of the lower levels to get out of the rain and start cutting.
Jeff always knew he wanted his screen to be 16'x9' and I was still deciding on my final size, so we cut the height to 9' all the way across, then cut 16.5' of length for him and 13.5' for me. His is on the right. We cut the leftover piece on the bottom into "test strips" to see what type of abuse the tarp could stand up to. We *tried* to tear one (nope), we burned one (stinky melted mess), and I soaked one in water overnight (no problem). These things are DURABLE!
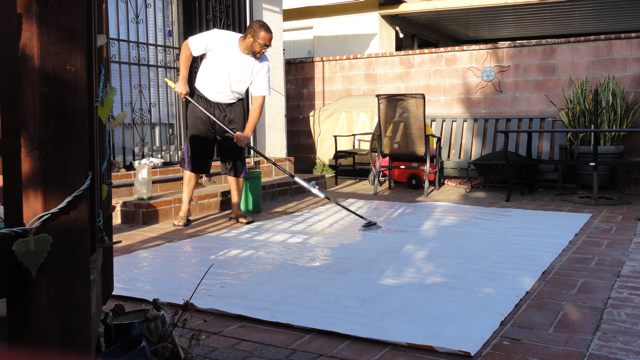
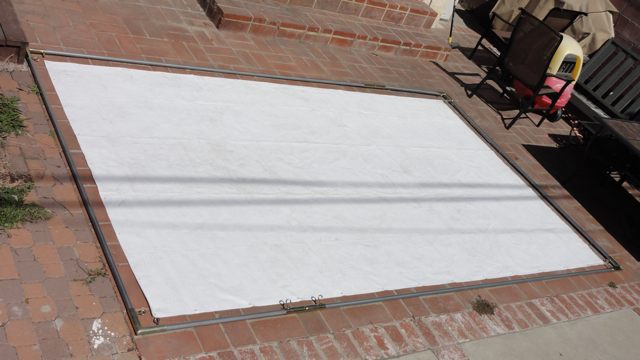
Later on, we cut the tarps into our final screen sizes in my driveway.
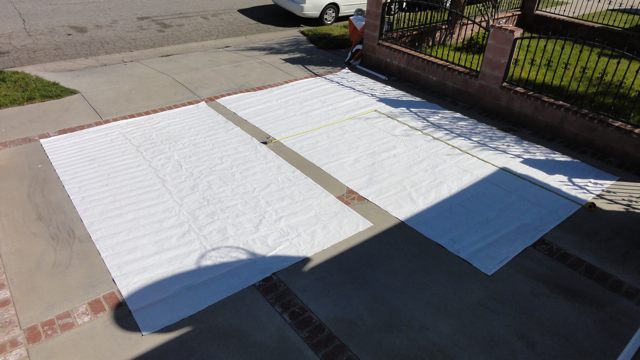
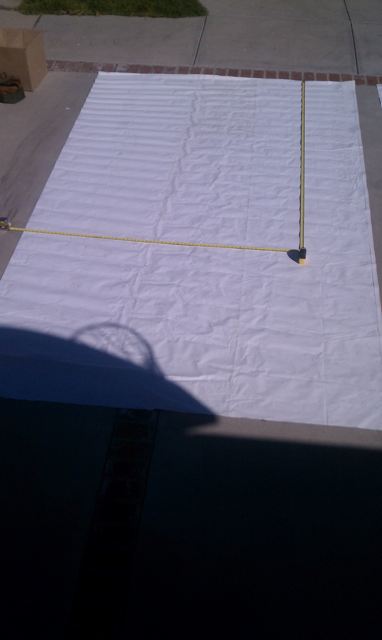
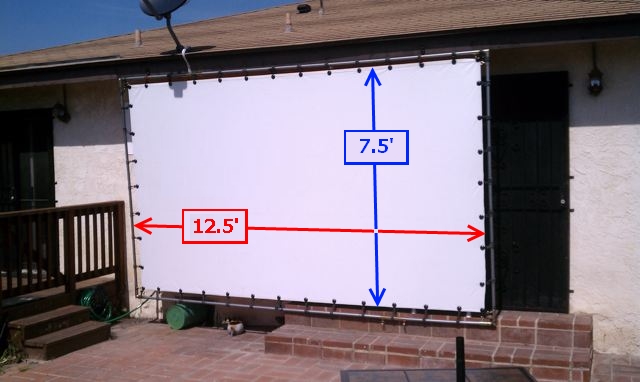
My 12.5' x 7.5' is on the left, Jeff's 16' x 9' is on the right. I probably could've gone bigger, but the size I chose really fits my yard best. But my tarp sure looks tiny next to his! And to make matters worse, he used a couple tape measures to map out the size of his OLD screen on top of his NEW screen, making MY screen look EVEN SMALLER. (Kinda hard to see the tapes in the above pic)
To make myself feel better, I did the same on my
new screen to compare to my old one (8' x 6').
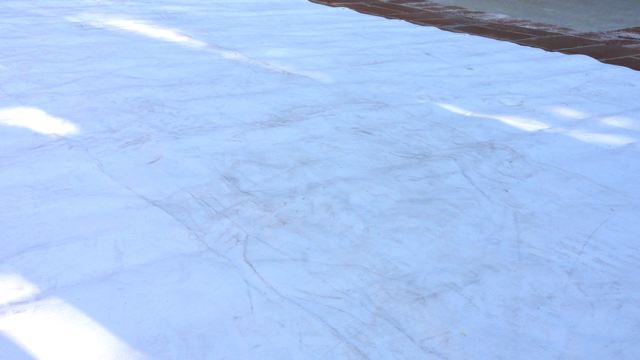
Once the screen was cut to size, I used some dish soap & water & scrubbed it with a car wash brush.
95% of the footprints & stains on the tarp washed right off. The other 5% are negligible and CANNOT be seen when the movie is playing. All the BYT vets are smiling and nodding their heads in agreement and all the n00bs reading this probably don't believe me.
ATTENTION n00bs: I WAS ONCE ONE OF YOU AND I DIDNT BELIEVE IT EITHER, BUT I PROMISE YOU WILL NOT NOTICE ANY OF THE DIRT, SCRAPES, CREASES, SPOTS, OR OTHER IMPERFECTIONS ON THE SCREEN ONCE THE MOVIE STARTS. AND YOUR GUESTS *REALLY* WONT NOTICE THEM!!! AND THE WRINKLES REALLY DO COME OUT ONCE YOU STRETCH OUT THE SCREEN IN THE SUN FOR AWHILE, I SWEAR!!!!!!!!
Ahem.
Back to the frame for a moment:
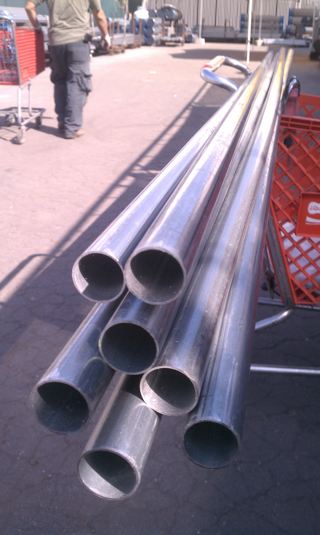
Somewhere in between getting rained on at the parking structure and cutting screens in my driveway, we drove to PTM Tarps Inc in Paramount, CA. That place is AWESOME and they have everything: stainless steel pipes, bungees of all sizes & colors, like 6 sizes of pipe fittings (3/4", 1", 1.25", 1.5", 1.75", and so on), tarps (the shiny kind, not suitable for BYT), ALL DAT. Their prices have increased DRAMATICALLY since we first discovered them, so feel free to shop around for yourself.
Here's a couple shots from our first of many trips to PTM:
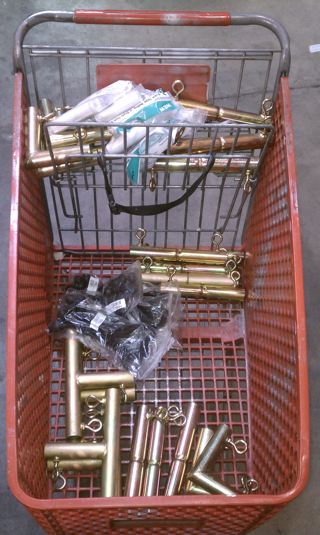 
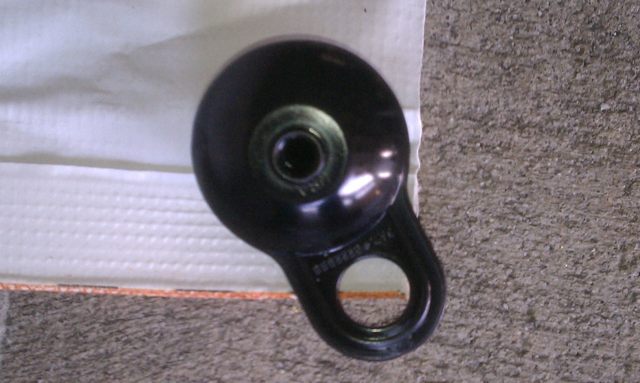
And these are ALL of the fittings I used for my frame:
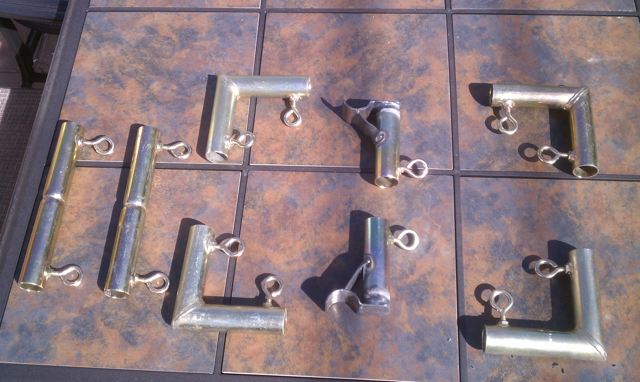
More about those weird "hook"-looking pieces in the middle later.
We cut our pipes and assembled our frames in Jeff's driveway:
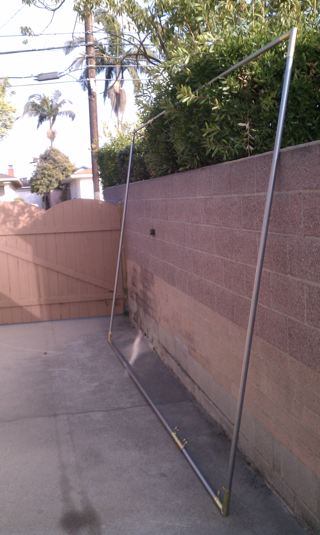 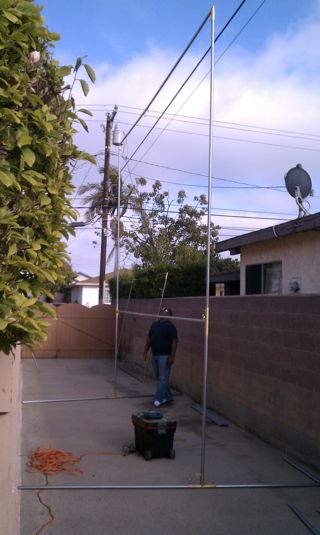
Mine (13' x 8') is on the left and Jeff's (17' x 10' + legs/feet) is on the right. If you squint really hard at Jeff, you can see my frame behind him being DWARFED by his massive frame. That jerk.
My frame will leave 3" of space all around the screen, Jeff opted for 6" around his.
After looking around and asking the helpful peeps @ BYT.com (R.I.P.), there doesnt seem to be a uniform amount of space people go with, so go with whatever works for you.
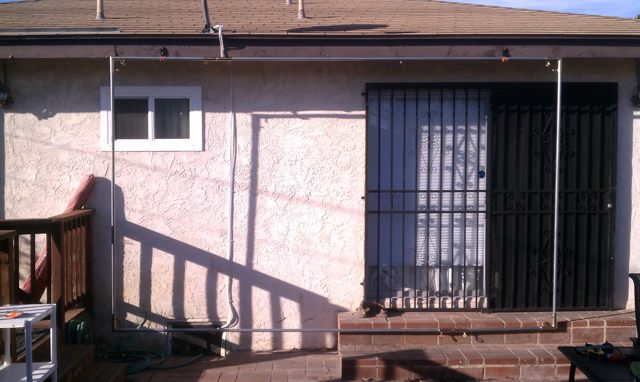 
This is my frame FINALLY hanging on the back of my house from some over-priced hooks I bought at Home Depot.
I originally planned to strap/bolt the frame to one of the walls of my backyard but this hanging setup I stole from my other buddy Hector works out much better for me, both in protection from the wind (more on that later) and because of how much more space it leaves me for seating based on the size/shape of my backyard.
FRAME + SCREEN = !!!
When we were cutting the tarps in my driveway, I was afraid that my screen was gonna end in a weird trapezoid-like shape because I didn't know what the heck I was doing. So even though I wasn't ready to hang my screen yet, I had to lay it on the ground down against the frame to ease my fears (I took this pic before I washed the tarp):
WHEW!! They're both the same shape (mostly).
At this point I'm running out of reasons not to, so I FINALLY mount my screen on the back of the house.
 Jeff found these "Tarp Grabbers" a few months before we even started cutting the tarps. We went with these instead of traditional metal grommets because we were afraid of what the sharp metal edges of the grommets might do to our screens (nothing to worry about in hindsight), and those metal grommets are a BISCUIT to put in. These big boys just need to be hammered together. I ended up squeezing them shut by hand with pliers in no time. Really easy & quick. All 4 sides took me less than 10 minutes.
Since we didnt go with traditional metal grommets we had to figure out another way to put holes in the tarp. That was an adventure by itself! Jeff had a hole-puncher gadget made to punch holes in things (duh) to add grommets but that thing was no match for the billboard tarp, either was the "school supplies" hole puncher we bought at CVS. Turns out the billboard tarps are a 3-ply vinyl + nylon mesh + vinyl sammich. That vinyl mesh is NO JOKE! We ended up having to melt holes through them with a soldering iron, but even the soldering iron had trouble getting through the mesh. I sure am glad we went with billboard tarp.
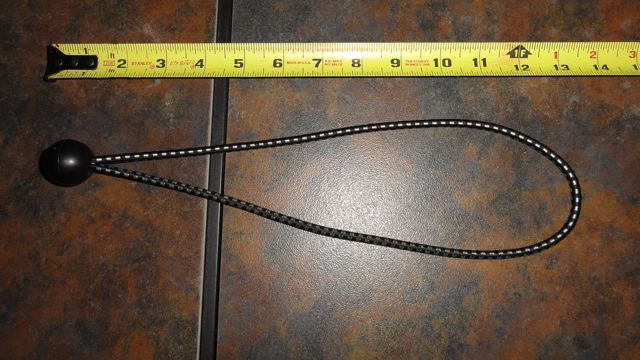
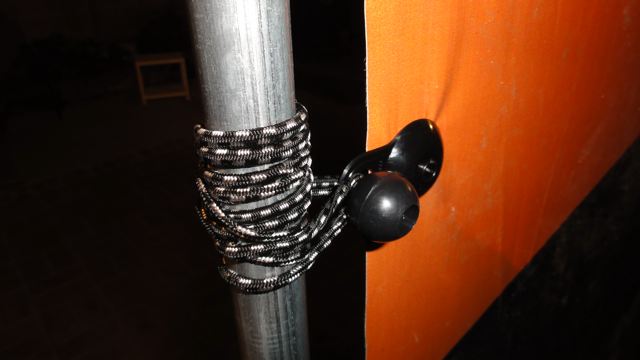
I could've gone with the 6" bungees instead but I'm glad I got these longer ones. Why? Well, you never know what else you might use the longer ones for...
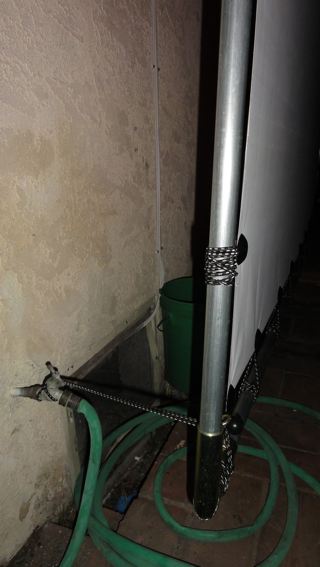 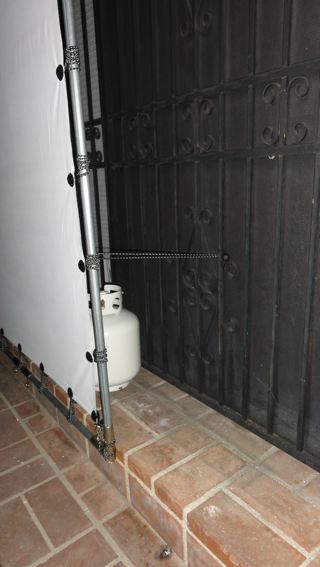 ...like tying the back of my frame down to the house to keep the wind from lifting my screen off my over-priced Home Depot hooks and sailing away! Since this pic was taken, I reinforced the screen more than once because of a couple freak windstorms, and I finally bolted the bottom of the frame directly to the brick steps below. Like I said, I don't plan on taking my screen down very often, so "ease of removal" was never an issue for me.
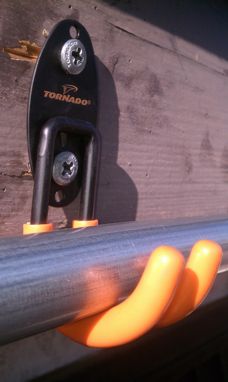
Spreader Bar:
Here's a shot of the back of my screen, my spreader bar (keeps the top & bottom of the frame from bowing under the bungee tension), and a close up of one of the infamous "Spreader Bar Hook" pieces. Kindly pay no attention to how crooked the bottom of my screen edge is.
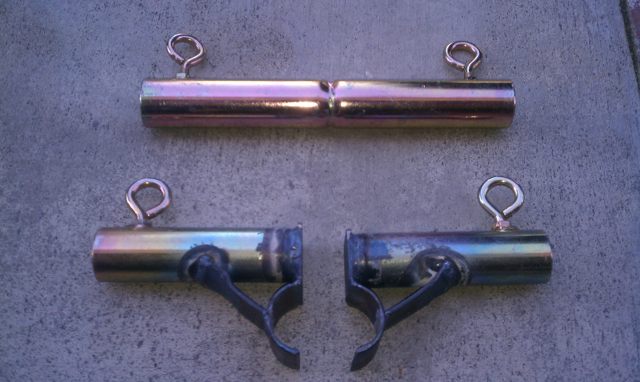
I brought 2 "straight through" couplers to my local welder and asked him to cut each in half and make 4 spreader hook pieces out of them. He made all 4 for $28 total; 2 for me, 2 for Jeff. Cheap!
FRAME PLANS
I made these plans at work while I should have been working after seeing similar plans from someone else on BYT.com
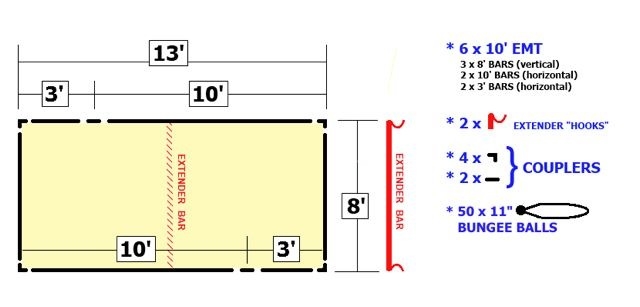
One of the things that really lit a fire under me to get started on my screen was seeing that other dude's plans. They weren't very special, but something about coming across those plans made me say "I can do this!". I hope reading my build story has a similar effect on someone else out there (maybe YOU??).
Enough of all that, BRING ON THE SCREENSHOTS!!
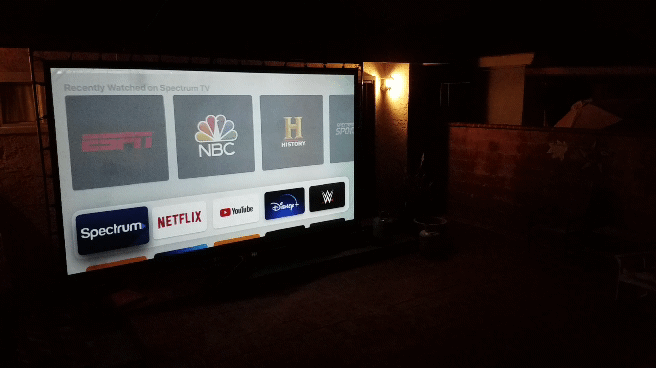
Most nights, I bring my Apple TV outside to watch all the streaming apps in full 1080p

LIVE TV via the Apple TV, but used to connect my indoor cable box with a 50' HDMI cable before that

Netflix

Disney+
We play a lot of Wii, Wii U, and PS4 outside...


...but we keep it old school too:


(Ask your parents, kids)
My 11yo's birthday party:


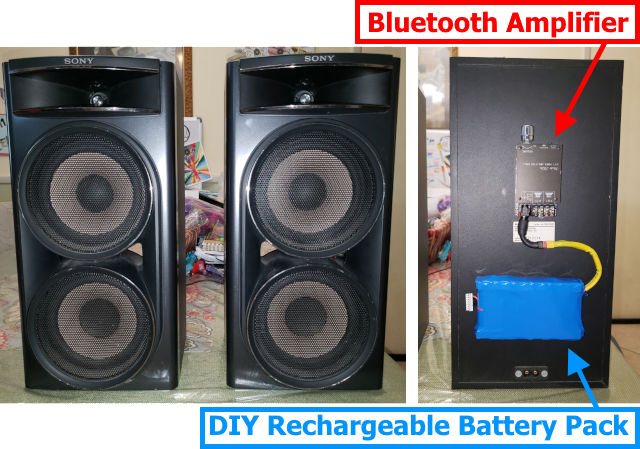
SOUND SYSTEM:
I bought a couple of used bookshelf speakers at the thrift store (2x 6.5" speakers + 1x horn tweeter on each) and attached a Bluetooth amplifier + DIY rechargeable battery pack to the back so I can place them anywhere I want in the backyard. Completely wireless!
And here's my new-to-me projector!

It's a BenQ MX711. I bought 2 of them used on eBay (One for my INDOOR setup, one for OUTSIDE) and they both work great.
CLICK HERE for all the specs.
Thanks for checking out my build story! Any questions?

|
|
|