|
| |
Saturday, May 12, 2012
I bought a new projector stand, then I MADE a better projector mount
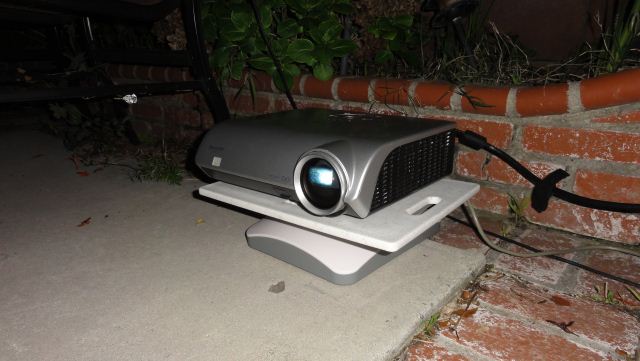 Our buddy tronn4 (of BYT.com fame) picked up one of these projector stands on sale at Fry's. The base swivels 360 degrees AND tilts in every direction. Makes aiming the projector SO MUCH EASIER than having to stuff newspapers and other random objects underneath it like I used to.

But I knew I couldnt leave the PJ on the ground forever. So after a little brain-storming, I came up with this:
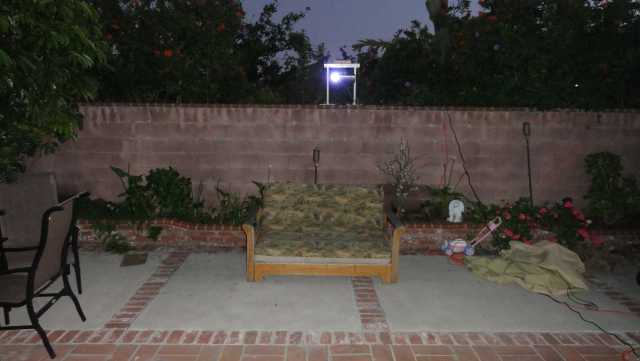
BOOM!
I knew I wanted to mount the PJ above my head by somehow by incorporating a ceiling mount. First I toyed with the idea of having a pole mounted in the flowerbed behind the seating area, topped with a "divingboard"-type piece to hang the ceiling mount & PJ from. But my strengths are in electronics, computers, and re-purposing ("boot-legging"), not fabricating, so I decided to mount the "divingboard"-type piece on top of the back wall instead, then hang the ceiling mount & PJ from that.
BUT HOW??
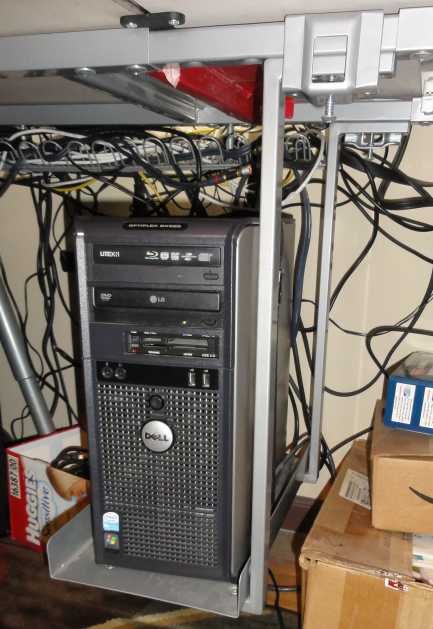 I was goofing off at work when I remembered I had an extra one of these Ikea computer-holder thingies laying around at home. It bolts to the bottom of your desk and keeps your computer tower off the floor. I figured if I turned it upside down and bolted it to the top of the wall, the big part could be my "divingboard"/shelf piece and I could hang the PJ from that. I dont think this Ikea thing could stand up to the elements for very long, so I brainstormed on a way to make it removable without having to bolt and unbolt it for every show. I was goofing off at work when I remembered I had an extra one of these Ikea computer-holder thingies laying around at home. It bolts to the bottom of your desk and keeps your computer tower off the floor. I figured if I turned it upside down and bolted it to the top of the wall, the big part could be my "divingboard"/shelf piece and I could hang the PJ from that. I dont think this Ikea thing could stand up to the elements for very long, so I brainstormed on a way to make it removable without having to bolt and unbolt it for every show.
In the meantime, I needed to know exactly WHERE on the wall to mount the mount.
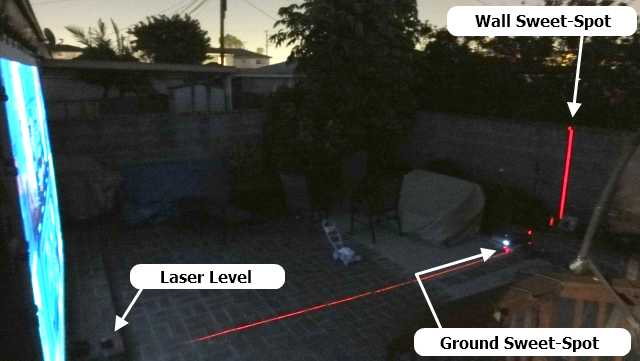
I did this by setting up my PJ on the ground to find the ground "sweet-spot" (perfect spot to place the projector so the image lines up on the screen correctly). Then I broke out my laser level to find that same sweet-spot on the wall, using the floor bricks as a guide to line them up together in a "good enough for me" fashion.
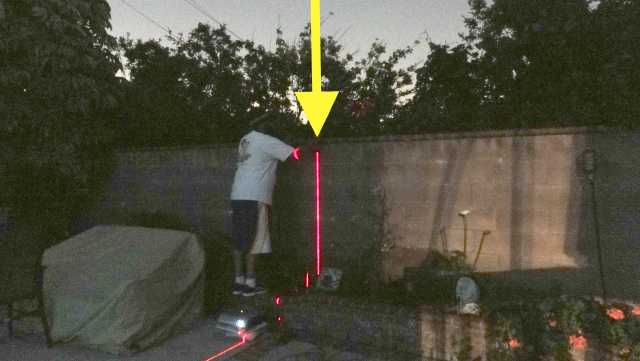
Then I marked the sweet-spot on the wall so I knew where to line up the PJ lens.
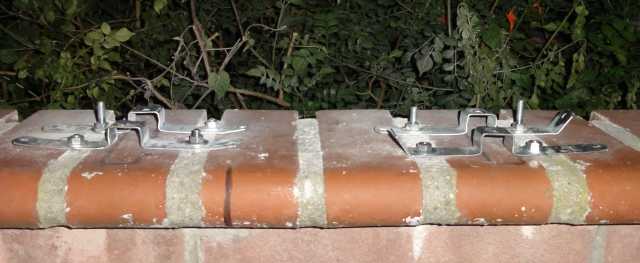
I found some "clamp pipes to the wall" pieces at Home Depot and bent them into the shapes I wanted, then bolted them to the top of the wall so the "legs" of the Ikea piece can slide in and out of those "channels" I made. You can see my "sweet-spot" mark in this pic too.
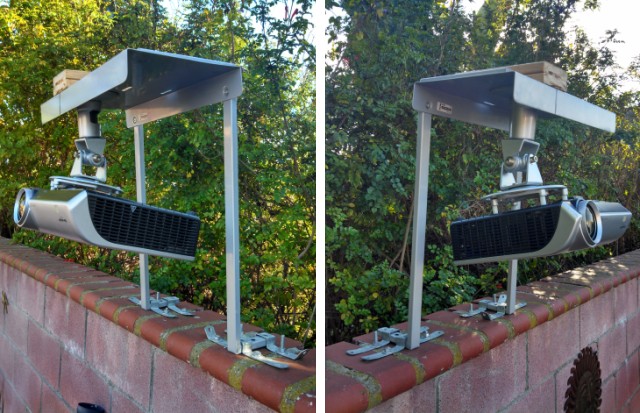
Ikea piece + ceiling mount + PJ = !!!
(Ceiling mount close-up)
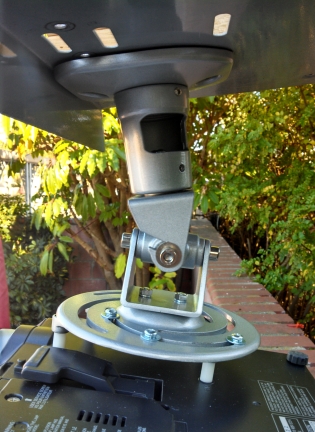 The ceiling mount is universal, so it'll fit just about any ceiling-mountable projector out there.
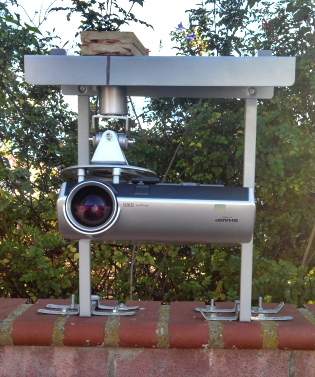 The Ikea piece leans a little, but this is easily corrected by the up/down, swivel/tilt adjustability of the ceiling mount. The Ikea piece leans a little, but this is easily corrected by the up/down, swivel/tilt adjustability of the ceiling mount.
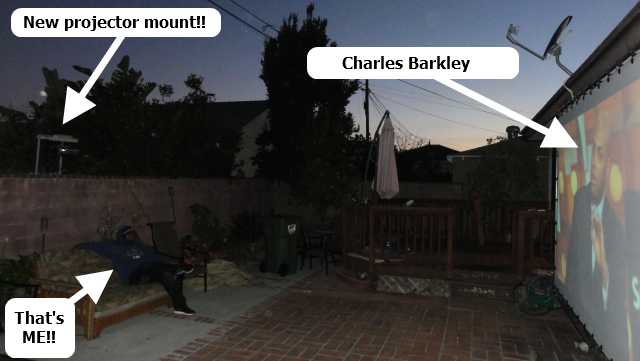
TA-DAAAAAAAAAAAA!!!!!
BONUS MATERIAL:
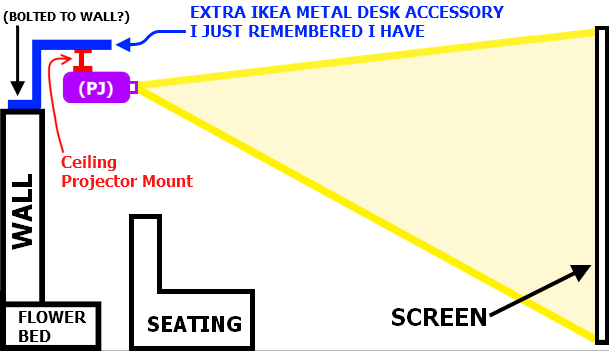
These are the plans I drew up at work while I should've been working.
|

|
|
|